To be fair and honest, not a lot has changed in this game in terms of the bare-bones mechanics since Ocarina of Time. However, the addition of masks that can drastically change the way you interact with areas is brilliant, and while the three-day system can be a little bit of a pain in the ass, it's innovative and I have to give Nintendo credit for the idea. In terms of difficulty, the puzzles in dungeons are a decent challenge and you're never thrown up against anything too horrible. (It even errs a little on the easy side, I think.) I will say that sometimes it's not at all clear where you're supposed to be going and what you need to get to proceed.
Music/Sound: 16/20
Majora's Mask has some wonderful tunes in it, and some lazy tunes in it. Each area (except Clock Town) has one of two tunes attached to it - either the main Overworld theme (once you've cleared the area's dungeon) or the "troubled area" theme which is slightly remixed to suit each area. I feel that it would have helped the game to have each area with its own music, but whatever. Some of the music is a little cheesy, and a lot of it is taken right from Ocarina of Time. When it's good, though, it's really good - Skullkid's theme was designed to sound like something out of a Chinese opera, and is definitely creepier than anything in Ocarina of Time. You definitely end up being more afraid of Majora than of Ganondorf. Each dungeon has its own great tune that was nicely composed.
The sounds are great, even if they are largely ripped right from Ocarina of Time. Instead of Navi's "hey, listen!", Tatl has her own little ringing bell noise. There are new noises for new enemies, some groovy new sound effects to go with the new visual blur effect, and that's about it.
Design/Graphics: 18/20
The game looks good - it's an improvement from Ocarina of Time. The textures are much improved, the colors are much better, and each environment was really treated with time and concern. I think my particular favorite is the Astral Observatory, which you visit right at the beginning of the game, but I can't honestly think of anywhere in the game I might call "ugly" or "nondescript." There are a few graphical issues - swords and weapons still clip through walls and floors, it's possible to wedge yourself into some weird camera angles, etc. Still, for the machine they were working with, they did a pretty great job.
Charm/Nostalgia Factor: 18/20
This game is the greatest thing ever. Who doesn't want to play a game over and over again which has a falling scowling moon in it?
I dock it a couple points because it doesn't have your traditional Zelda/Ganondorf/Link trio and Hyrule, so it doesn't always really feel like a Zelda game. Still. The greatest thing ever.
Story/Concept: 20/20
This game's story and concept are flawless - not because of what they tell you, but what they don't tell you. What is Termina? Where is Termina? What does the Happy Mask Man represent, and why is he there? What does it mean that Link ends up with a mask more evil than Majora's Mask? Who are those protective gods, and how do they relate to Din, Farore and Nayru? Who is Ikana's royal family, and how did they relate to Hyrule? Is Link dead, or alive? Does Kafei turn back into an adult at the end, or not? (They show his wedding, but only Anju!) Does Link ever find Navi? Where does he go after he leaves Termina?
I can't say enough good things about the story and concept of this game. Seriously.
Total: 89/100
I love this game. I really do. It's got some flaws and the age is starting to show a little bit, but as far as I'm concerned, no other Zelda has a story that is nearly so complex and ambiguous. I like that in a game.
So here we are in the Stone Tower Temple, the very last temple of the game and one of the most interesting. (At least, I think so.) We're presented with three temple gimmicks here.
One, you've got the Elegy of Emptiness now, so you can hold down several switches at a time with your various forms. Two, using the Mirror Shield and the Light Arrows (which you get in the dungeon,) you can reflect light around and/or destroy sun blocks with the mighty power of the sun. Three, this temple flips upside-down halfway through, which Nintendo manages more elegantly than you might think.
There are places where the fact that the temple flips around can be a little bit frustrating, particularly if you're collecting the Great Fairy fragments in this temple. When switches are pressed, often chests will appear on the ceiling where they can't be accessed unless you go back to the beginning of the temple and flip it over again using the Light Arrows. These chests also allow you to reach new areas with your hookshot, though, so the feeling is fairly organic. The design of the dungeon is such that it works really well both ways, and the upside-down layout is so unnerving in places that it really gives an interesting feel to the second half of the temple. (For example, as you can see in the upside-down room above, loads of the rooms suddenly have huge areas where you can fall into the sky. It's a cool effect, particularly at night, I think.)
Garo Master
One of the things I don't love about this temple is the number of mini-bosses that you have to get through to complete it. Don't get me wrong, I like my Zelda combat and everything, but there's three in this dungeon (maybe four, if you count the Eyegore, which is like a walking Beamos with attitude) and one of them is a Wizrobe. Trust me, by this point in the game, you are sick of Wizrobes. On the bright side, the other two are original and make for an interesting break from the puzzles - one of them is the Garo Master, who is actually kind of a pain in the ass because he counterattacks whenever you slash him. The other is Gomess, who is another one of those enemies-surrounded-by-smaller-enemies-who-can't-be-hurt-unless-you-get-rid-of-them-type bosses. There are a lot of these types of mini-bosses in this game.
Anyway, once you get to the end of the temple, you face the boss as usual. This time, though, you've got the Giant's Mask that you pick up for beating Eyegore. The Giant's Mask can only be used in one place in the entire game, and it just so happens to be in the boss arena of this temple.
Fighting Twinmold with the Giant's Mask.
The bosses of this temple are Twinmold. They're a pretty standard kind of boss for Zelda - there are similar bosses in A Link to the Past. Basically, it's two floating worm-type bug-things that you can only damage by slashing their heads or tails, and you have to kill them both to win. They dive into the sand and burst out again every now and again. Besides running into you a hell of a lot, they don't actively attack you. The catch is, these guys are huge, and it is insanely difficult to hit them with anything while you're at regular size. So, that's where the Giant's Mask comes in - you put that baby on, and you grow big enough to face them properly. The only problem is that it saps your magic meter quick-like, and once you run out, you shrink again. There are columns around the arena that can be smashed when you're giant that drop magic bottles, but you have to shrink down to normal size to pick them up. It's a pain in the ass.
Maybe he just meant that he wants
us to give him a call sometime to meet for coffee.
That would be embarrassing later.
Once you kill these guys, you're warped back to bubble land for the last time. Tatl helpfully points out that both her and Link have helped all four giants, and that's pretty much it from your side. The giant says "call us" and Tatl decides to interpret that as them agreeing to help out with fighting Skullkid. The last thing this giant says is "forgive your friend," but Tatl is a bit slow and doesn't get what he means. As usual, after this riveting conversation, you're spit back out into Ikana Canyon where pretty much nothing changes and it still sucks. Beating that temple was so worth it! Yay!
Now it's showdown time with Skullkid. All you have to do is head back to Clock Town and wait out the three days, just like the first time, and climb up the Clock Tower once it opens up at midnight on the Third Day. A lot of people like to obsessively prepare for this battle, but as long as you've got a few fairies kicking around and a lot of arrows, you should be absolutely fine.
Yay weird naked giants!
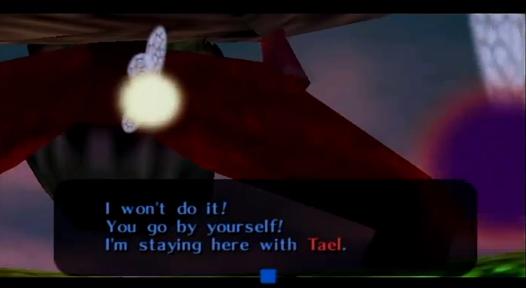
Once you're up there, the same scene we saw at the beginning of the game plays out again, but this time with a few key differences - for example, you're not about to get your ass kicked this time. Tael helpfully reminds us to bring the four giants to the arena, Tatl is all sassy to Skullkid, and Skullkid tells you (again) that you should try to stop it. That's your cue!
Once you play the Oath to Order (that song Link learned from the first giant) Skullkid has a massive freak out. The giants appear from all four corners of Termina and manage to just stop the moon from falling with their massive, Roald Dahl bodies. Hooray!
That works out super well and Skullkid falls to the floor, which is awesome. Tatl sasses him some more, because she's like that, and Tael is a big loser and tells her to forgive him and stuff. Obviously he didn't see the disturbing crap we've been put through over the last umpty-billion three day cycles.
For all her annoying phrases, I can see why Link
wants Navi back. Apparently most fairies are total sissies.
Then, Majora's Mask starts talking. It turns out that it's sentient and has just been using Skullkid as a vessel this whole time. It discards Skullkid's body and starts the moon moving again, which is too much even for the giants to handle, apparently. They strain under the weight, and Majora's Mask warps itself into the centre of the moon. Obviously, you're meant to follow.
Tatl shows her incredible bravery by refusing to follow Majora's Mask into the moon, until Tael mans up and says he'll come along. You all warp into the moon together.
Moon! Moooooon!
The moon doesn't look at all like you might expect. It's a huge green field with a tree in the middle of it, and looks like somebody's interpretation of what limbo or heaven might look like. It's all very glowy and oversaturated. As you run closer to the tree, there are four kids, each wearing one of the masks you got from the four bosses of the temples - Odalwa's Remains, Goht's Remains, etc. If you managed to collect all the masks, you can trade them to these kids in exchange for the opportunity to play through one of their mini-dungeons. Each mini-dungeon is themed like their respective temple, and are actually fairly difficult. Unless you have a great desire to get the Fierce Diety's Mask (which I don't blame you for doing - it's pretty awesome) I wouldn't bother with these.
In Japan, this mask is
known as the 'Oni Mask,' which means
demon.
At the base of the tree is one more little kid wearing Majora's Mask. If you talk to him, he asks you if you'd like to play with him. If you say yes and have masks still in your inventory, he comments on how crap they are before you fight. If you have no masks in your inventory, he decides to be a good sport and gives you the Fierce Diety's Mask so you can play "good guys against bad guys."
The Fierce Diety's Mask is the final 'transformation' mask in the game, and can only be used in boss arenas. Basically, it turns you into a scary version of Adult Link from Ocarina of Time. If you have magic power, you can shoot sword beams, and you do a crapload of damage.
When Majora gives it to you, he tells you that you're the bad guy, and the bad guy's job is just to run away. The Fierce Diety's Mask's description reads: "Could this mask's dark powers be as bad as Majora?" (Translation note: in the Japanese version, the mask is called the Oni Mask, or Demon Mask. When you play tag in Japan, the person who is 'it' is called the 'Oni,' so that's what Majora is referring to.)
You're then warped to an arena where you face the three forms of Majora - Majora's Mask (a huge version of the mask with tentacles growing out of the back of it,) Majora's Incarnation (Majora's Mask with spindly legs and arms which runs around the room,) and Majora's Wrath (Majora's Mask with burly arms and legs and whips growing out of its arms.)
None of them are particularly difficult, especially if you have the Fierce Diety's Mask equipped. If you don't, all three forms are similar to enemies you've fought before - you can only hit the first form from the back, the second form is quick so you have to wait for it to slow down before you can hit it, and the third is okay as long as you stay away from it's tentacle whips.
I'm going to be honest here - this battle is really not what it should be. When you fought Ganondorf/Ganon in Ocarina of Time, it was a big deal. It was scary. Your palms got all sweaty and it was hard! There were time limits, there were collapsing towers, there was a giant form which could kick your ass if you weren't sure how to approach it properly, you got your sword kicked away...it was huge. This battle, not so much. It's easy without the Fierce Diety form, and it's a waste of time with it on.
But, in a way, I'm okay with that. This Zelda isn't really about the temples or the fighting or the bosses - it's about the people and the land. It's about figuring out people's secrets and fixing their problems. It's a game full of mysteries that are never solved, whether it takes place in Link's subconscious or it's sort of an Alice in Wonderland or Wizard of Oz story after Link falls down the hole in the tree. I love that about this game.
Anyway, once you beat Majora's three forms, that's it. You're done. The ending sequence is absolutely phenomenal - I have to say that it's probably my favourite of any Zelda game. Depending on how many masks you got, you get a different ending - you only get the complete ending if you got all of them. If you missed one, you won't see the scene associated with that mask.
Here's the ending for your viewing pleasure.
The very end of the game is mysterious, like everything else. Link rides back off into the forest he came from, but to what? It looks otherworldly in some ways, not at all like the Lost Woods of Ocarina of Time. Some people are convinced that Majora's Mask entirely takes place while Link is at the edge of death, and that the forest represents the gap between death and life. Is Link riding back into the world of the living, or away from it? Is the forest just the Lost Woods? What happens to him after Majora's Mask? Does he ever find Navi?
I hope you enjoyed this really ridiculously long "summary" of Majora's Mask. It's my favourite in the series for a number of reasons, so I hope you'll forgive me for spending a lot of time on it. I'll be back later with a comprehensive review of the game, and then we're on to Oracle of Seasons!
So now we're off to Ikana Canyon, the fourth and final area in Majora's Mask. It's all very exciting. This place is barren and sucks, even after you beat the temple - everything's dead and brown, and there are tons of Gibdos (mummies) hanging around. You can't even enter this area yet, though, because there's a freaky looking one-eyed weirdo on top of a cliff who is blocking your path. She/he/it wants you to get a mask that you can find by the ranch before you proceed, so we have to backtrack. There's a lot of backtracking in this part of the game.
"Sorry about that. I have
a business agreement with the Gorman bros. that
gives me five rupees for every moron
who I can get to bring back one of those masks."
Anyway, near the ranch is the Gorman bros. racetrack. Both of these guys look like Ingo from Ocarina of Time, and they're kind of dodgy. You can challenge them to a horse race, and if you win, you'll receive the Garo's mask. The Gorman bros. apparently have a few of these masks hanging around, because they both wear them whenever they're beating up Cremia's milk cart. (You have to fight them off after you save Romani ranch from aliens.)
The Garo are scary spirits that hang around the Ikana Canyon area who you can fight to get information about what to do next, but they'll only show up if you wear the Garo's mask in the right places. Otherwise, it's pretty irrelevant.
This sprite swap from Ocarina of Time is so lazy that they
didn't even bother to change their names. Or maybe
they just spent a really long time coming up with the Sharp
and Flat puns and didn't want to let them go to waste.
Upon exploring the area a little bit, you'll notice a few things. One, there's a stupid-looking house surrounded by Gibdos, and two, there's a dry creek that runs by that house which leads into a cave. If you go into the cave, you're greeted by one of the two composer brothers from Ocarina of Time. He doesn't like the fact that you've come to Ikana since you're all alive and stuff, so he offers to kill you, which is some good problem-solving on his part I guess. Anyway, he starts playing a song which slowly does damage to you and if you don't leave, you'll run out of hearts and die. Good stuff.
So off we go to the Graveyard, which is another area in and around Ikana Canyon. If you come here at night, there are a bunch of stalchildren who will try to kill you. In the daytime, it's pretty peaceful. There is a huge stalchild who is apparently asleep under an arch who you naturally have to beat up, 'cause that's how Link rolls. Play the Sonata of Awakening and he'll wake up and start running away from you. You have to catch him while beating up a bunch of other stalchildren (normal-sized) within a certain amount of time or else he's all like SCREW YOU BRO and goes back to sleep.
That's one big skeleton.
Once you beat up this guy, he gives you the Captain's Hat, which makes all the little stalchildren who run around at night think that you're their leader. They patrol around the graves at night and if you ask them to open the one they're patrolling on the first night, you can drop down there and get the Song of Storms from Flat, Sharp's brother, who he totally murdered. Flat asks you to play the song to Sharp, so off we go back to the cave.
Once you play the song to Sharp, he is suddenly not a bastard and apologizes. The creek is also restored to normal, which allows us the joy and pleasure of watching a terrible cutscene. The creek flows by the weird house, which turns out to be a music box house that plays music that kills Gibdos. Hooray! Once all the Gibdos have been killed by horrible music and rainbow light, a little girl from inside the house runs out and examines the now-flowing creek. If she sees you, she will run into the house and lock the door, so you have to sneak by her like a boss with the Stone Mask.
Inside the house is her father, the Gibdo researcher, who is (incidentally) slowly being turned into a Gibdo and tries to attack you and stuff. Link solves the problem in his usual way by playing the Song of Healing, which actually doesn't kill the guy this time but does result in you getting the Gibdo's Mask from him. Hooray! Watch a touching scene between him and his kid and then leave, 'cause there's other stuff to do.
The Gibdo's Mask makes Gibdos think you're one of them, so like the Captain's Hat, you can now chat them up. This leads to probably the worst part of this game, hands-down. I can put up with a lot of fetch questing, don't get me wrong, but this sequence is long and unnecessary. There's a well in the Ikana Canyon area that you can jump down, and you'll find down there a couple of Gibdos guarding doors with bars over them. If you talk to them, they ask you (in riddle form) for a particular item. If you give them what they wanted, they will return to the grave and open the door for you. Behind which you will find more Gibdos looking for more stuff. And so on.
This is not a big deal except that there are tons of them, and one of the first ones asks for a blue potion, which means you have to leave the area, go back to the Swamp, find a mushroom in the woods using the Mask of Scents (God help you if you didn't pick it up before, because that means completing Woodfall Temple again,) give the mushroom to Koume the potion lady, and then go back to the Bottom of the Well and hand it over. That's the most annoying one, fortunately, and most of the items you need are conveniently found in the Bottom of the Well (including a cow for milk, which is a bit odd) but still. Come on, Nintendo, really? Why not another mini-dungeon or something? Item trading quests are just not that exciting.
Ikana's Got Talent!
Anyway, once you've made it through Gibdo hell, you receive the Mirror Shield! Hooray! Remember how cool the Mirror Shield looked in Ocarina of Time? Awesome, right? No. Even the Mirror Shield gets to have that disturbing Majora's Mask touch by having a traumatizing face on it.
You can now melt sun blocks using light, so Link goes up a ladder from the Bottom of the Well and into Ikana Castle, which was previously unreachable without the shield. This is a surprisingly cool mini-dungeon, and almost makes up for the crap we had to put up with at the Bottom of the Well. If you run around here with your Gibdo Mask on (or the Captain's Hat,) most of the enemies will not only leave you alone, but dance for you! Awesome!
There's a few short puzzles in here, one of which requires a Powder Keg to be solved, so enjoy running back to Clock Town for that. Thanks again, Nintendo. At the end of this dungeon is a boss fight that basically just requires a lot of fairies to beat, since the boss is cheap and will kill you a lot for no reason with his unblockable attack (which involves him detaching his head and then biting you. It's great.) The boss is Igos du Ikana, the totally dead former king of Ikana, and once you defeat him and his two lackies, he'll teach you the Elegy of Emptiness.
You shouldn't have done that.
Let me explain to you why the Elegy of Emptiness will haunt your nightmares. What it does is create a shell of whatever form you're currently in (Goron, Zora, Deku, Hylian,) which will allow you to hold down switches with that dummy form while you continue on. This is awesome and whatever except that the Hylian one is literally so creepy that it has spawned its own horror ARG.
Now you can officially make your way up Stone Tower to reach the Stone Tower Temple! Hooray! I know I'm excited. The entrance to Stone Tower is back out in the Ikana Canyon area, and can only be entered by using your Goron form to roll up into the door.
Stone Tower is really tall, and consists of a few layers of what is essentially the same puzzle. Each layer has three switches that you have to hold down in the right order (using the Elegy of Emptiness) so that a row of three blocks will span across the empty chasm in the middle of the tower so you can proceed. Once on the other side, you go up another layer using your hookshot and the convenient targets that are hanging around.
After a few rounds of this, you reach the entrance to the Stone Tower Temple, which is freaky-looking (just like everything else in Ikana Canyon.) One more round of the switches, and you can jump across some floating blocks to enter.
Next time - Stone Tower Temple and beating the crap out of Majora's Mask. Also, the end. Seriously. I promise.
So when last we spoke, some baby Zoras had just hatched and taught Link a song to get into the Great Bay Temple. Awesome. We take this song to their mom, Lulu, who is the singer of the Indigo-Gos. (You remember - the guitarist Zora who we turned into a mask was the guitarist.) She's lost her voice for a variety of reasons involving losing her eggs and the sea around Great Bay going all weird and cloudy lately, so if you play the song to her, she will magically get her voice back! Hooray!
Incidentally, the song also summons a giant turtle. You can hookshot onto its back and it'll take you to the temple. There's a little cutscene on the way of the lady pirates trying to approach the temple as well, but their ship gets caught up in a vortex protecting the temple and they get thrown into the sea. I guess they should have found a giant turtle, too.
The temple's layout is interesting in that it's largely mechanical - there are gears, propellers, water-wheels and spouts that are all part of the puzzles in this dungeon. It's also not my favorite. I find it a bit confusing, and while all the puzzles are well-integrated into the overall dungeon scheme, I hate having to backtrack to old rooms because I've turned a switch here or changed the direction of the water there. But hey, some people like that stuff, so whatever. You also get the ice arrows in this temple, which you use mainly to freeze jets of water in order to stop pieces of machinery from moving (allowing you to get to a new exit, usually.) There's also two fairly tricky sub-bosses and a water-based boss level, which is always an exciting time.
The boss itself is Gyorg, which is a giant fish. Not one of the more fun or creative bosses in Zelda history. Link stands on an island in the middle of a watery arena, and Gyorg occasionally rams the island which sometimes might make Link fall off of it and into the water. If you shoot Gyorg with an arrow, he is stunned and floats to the bottom. If you turn into Zora Link, you can jump in after him and zap him with your magical Zora shield, rinse and repeat. It can be a bit hairy because you're always convinced that while you're in the water he's going to eat you (which he does if you don't get out of the water fast enough,) but it's not difficult.
Once you beat Gyorg, the temple is finished! Hooray! Link gets Gyorg's remains. Back to psychedelic rainbow bubble land. Tatl gets all bitchy at this Roald Dahl giant because she's entitled like that and assumes that surely, only potato-like giants with giant green mustaches can save the world. It responds "help our friend," so we're off to the next temple.
Sorry for the briefness of this update! Next time - all the crap before we get to the Stone Tower Temple. There's a lot of it.
When last we left our intrepid hero, he had just saved the Gorons from freezing to death. What a guy! At this point, there's a few errands that you have to do before moving on.
First, you have to go see Medigoron in the village. Apparently he's not sore about you murdering his big brother, because he offers to give you a license to use powder kegs. Powder kegs are like regular bombs, except that they're totally useless - you can only carry one at a time, and they're only good for two things in the entire game.
Anyway, to qualify for a powder keg license, you have to go destroy a big boulder which is blocking the Goron racetrack. He gives you a pre-lit keg and tells you to run and destroy the boulder before the keg blows up in your face. Whatever. This is use number one for the powder keg, and once you do it, you can get into the Goron racetrack. If you win the Goron race (which is basically what hell is like, because it'll take you all night to win it) you get a bottle with some gold dust in it, which you can take to the swordsmiths that live in the Mountain Village and they'll upgrade your sword for you. Hooray!
Besides a few mask-related sidequests, there's nothing else to do here, so we're off to Great Bay! Awesome! Except when you get there, it's blocked by a wall that you can't climb over. Before you can even get into Great Bay, you'll need something that can get you over that wall. This eventually leads you to Romani Ranch, which is near Clock Town. Skullkid has blocked the road to the ranch with a giant boulder, which incidentally can only be unblocked by using a powder keg. This is probably the last time you will ever use a powder keg in this game.
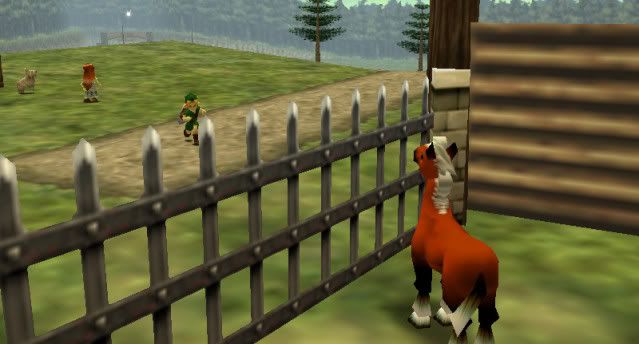
Anyway, upon entering Romani Ranch, you see Epona in a pen next to the farm house! Yay! Skullkid didn't kill her after all! Romani, the farm girl (who shares a sprite with kid Malon from OoT) evidently found Epona and has been keeping her safe for you. Isn't that great?
"Them."
She teaches you Epona's Song and then explains that she needs a little bit of help around the ranch. No big deal - it's just that every year before the Carnival, all of their cows get abducted by "them." She explains that they come down in a ball of light and take the cows right out of the barn. This year, she's taking steps to prevent it, so she needs some help from you in driving them off.
This sidequest basically consists of you waiting around the ranch until 2 AM, at which point aliens come down from their ship and slowly float towards the barn. They look basically like how you would expect floaty ghost aliens who steal cows to look. Anyway, you hold them off by pegging them with arrows, and in the morning everyone is very grateful and you get a bottle of milk from Romani. Hooray! There are some other things you can do here, including marching around with a bird mask in order to magically age some chickens for a guy with a mohawk, but that's all part of the joy of playing this game yourself.
Funny that Link never thinks to call a doctor or something.
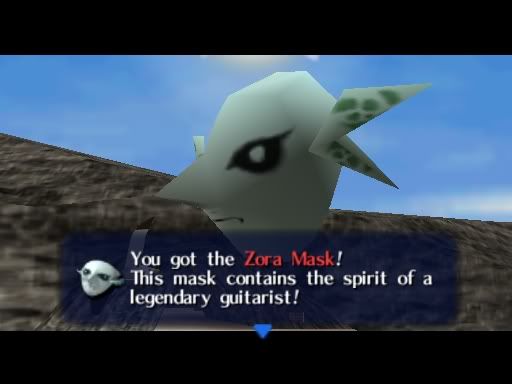
Once you successfully enter the Great Bay Coast, you notice some seagulls floating around a Zora who is stranded in the water. Push him to shore, and he'll explain that his name is Mikau, the guitarist for the popular band the Indigo-Gos. He explains that he was mortally wounded trying to save some Zora eggs that the singer of his band, named Lulu, recently laid. The eggs were stolen by an all-female group of pirates who have a fortress nearby. He begs you to save the eggs in his place, and then in typical fashion, Link turns him into a mask. Nice guy.
This next part of the game is actually sort of entertaining - in the spirit of invading the Gerudo Fortress in Ocarina of Time, your task is to enter the Pirate's Fortress incognito and save the four Zora eggs that are there by sneaking around and not being caught. The pirates are sprite doubles of the Gerudo, and have stolen the eggs in an attempt to get into the Great Bay Temple. Apparently, Skullkid was there and told them that the eggs were crucial to getting in. It's kind of amazing that anybody listens to a freaky-looking guy made of wood with a scary mask on, but I guess these are trusting folk.
After you get the four eggs from the pirates (and their prized treasure, the hookshot - apparently Link can't help looting a bit wherever he goes,) you have to rescue three more from some giant sea eels with the help of a magical golden seahorse. The seahorse was captured by a gross old fisherman who decides to trade it to you in exchange for a pictograph of one of the female pirates, which just goes to show that Link is not a big 'moral standards' kind of guy.
Anyway, once you save all the eggs and reunite the seahorse with his girlfriend, you take the eggs to the Marine Research Lab, where they all hatch together. Interestingly, baby Zoras look remarkably like music notes and they arrange themselves into a song. It's totally weird, but by this point in the game, you should be pretty much used to it. This song will allow you to get into the Great Bay Temple.
Next time: the temple, finally. Also, a horse race and some mummies.
After the exciting events at the Woodfall Temple, your next stop is the mountains - specifically, Snowhead Temple. But, because this is Majora's Mask, nothing is straightforward. Link's got a few stops to make first.
One of the great things about Majora's Mask is that while you're certainly directed to one place or another, there is a certain level of exploring that you have to do before you can get where you need to go. The mountains are a large area, including a hub area with a little house owned by swordsmiths, the Goron village, and the path to Snowhead Temple. The way Link is now, he's not equipped to even get near the temple, so exploring it is.
"Seriously, Link, just step off the cliff into the abyss. It'll be totally fine."
As you explore the Goron village, you run into Kaepora Gaebora, the helpful sage owl from Ocarina of Time and several other Zelda games. Being the nice guy he is, he directs you to jump across some invisible, slippery blocks to a floating ice cave with no direction on where to step except for a few feathers. He does mention that there's something cool in the ice cave, though, and he's not lying - inside is the Lens of Truth, a late-game item from Ocarina of Time.
On the way back out from the ice cave, Link sees a little shadow on the ground. After whipping out the ol' Lens of Truth, you come face to face with a dead floaty Goron. He's pretty much as surprised as you are about the whole "I see dead people" situation and asks you to follow him.
After chasing him around the village and finally up a sheer cliff face with invisible ladder rungs, you find another cave (apparently Gorons love the whole cave thing) with the dead guy's grave in it. Apparently, his name is Darmani, and he's some kind of Goron hero. He got blown off a cliff face while trying to reach Snowhead Temple and died, which sucks for him. He asks you to "heal" him, and in response Link plays the Song of Healing (which the Happy Mask Salesman taught him). This turns Darmani's soul into a mask, which seems a bit less like healing and a bit more like sealing a dude in a mask for all eternity, but hey, we have to trust that a guy who is totally dedicated to collecting masks even if they can end the world wouldn't have any ulterior motives in teaching Link a song that turns people into masks.
Whatever.
Anyway, now we have the Goron mask. Link's Goron form can punch things, ground stomp, roll really fast, and lift and push heavy things. It is also very slow when walking, can't jump or climb very well, and drowns instantly in water. It'll serve as your powerhouse form, but doesn't have much finesse.
All the Gorons in the village now refer to you as Darmani, and they're understandably surprised to see you, seeing as Darmani is dead and everything. It turns out that the winter has gone ugly in Snowhead, threatening to freeze even the Gorons to death. Worse than that, the Goron village is filled with the sound of the world's most irritating crying from the son of the Goron elder, who is missing his father. Your task is clear - stop the kid from crying by finding the kid's father. Off you go.
Sucks to be this guy.
When you finally find the kid's dad, he's frozen in an ice block. You have to thaw him out using hot spring water from Darmani's grave, which is hard because hot spring water cools off quickly. After several inevitable screw-ups, you thaw the elder out. At first he refuses to believe you're real, since Darmani is dead, but once he discovers that his son is having the world's most annoying temper tantrum, he agrees to help you out by teaching you the Goron's Lullaby. Or, at least he tries to - he can only remember the first part of the song, since he's all old and was frozen in an ice block and stuff.
You'd think Link would take this opportunity to maybe save the Goron elder, but this isn't Link's style. Instead, you motor back to the Goron village and play the intro to the crying kid, who teaches you the end of the song. Once you play it to him, he falls asleep - along with all the other Gorons in the area. The usefulness of this will be apparent later.
A massive Goron who blows at you to stop
you from getting into the temple. Also,
he's invisible. Good thinking, Nintendo!
Anyway, since Link has what he needs to get to the temple now, off he goes. When you make it to the narrow path to the temple, the first thing you notice is a wind gust coming from somewhere which pushes you off if you try to approach. Using the Lens of Truth, you see that the wind gust is coming from a massive, invisible Goron, who is apparently trying to protect the temple from intruders. (This is one of the dumbest things I have ever seen in a game, and it is also never explained. I guess they just really, really wanted to use that Biggoron sprite from OoT.)
The natural response from Link is not to try to reason with the big, invisible Goron, but instead to murder him. That's our boy! By playing the Goron's Lullaby, you make Biggoron fall asleep and roll into the deep gorge below, landing at the bottom some time later with a mighty thud. (Comment from Anonymous: When you finish the snowhead temple and go back to the temple, biggoron is well and alive and you get to speak to him. He says that apparently he was being possessed by something in the temple, forcing him to do what he did.) So we can all be pleased that Link isn't going to jail! Hooray!
Snowhead Temple's main room.
Snowhead Temple itself is largely comprised of a central hub room with multiple levels - taking advantage of the much greater draw distance and reduced fog, you can see clear down to the bottom floor and up to the top floor at all times while in this room. The action mostly centres around climbing up and down the tiers of this massive temple, using the Goron form's fast rolling speed to jump across great distances. The item you get from this dungeon is the Fire Arrow - just like in OoT, it melts ice and lights stuff on fire. It's awesome.
Once again, the enemies are well-designed for the temple, the rooms are expansive and distinctive, and the puzzles are mostly driven by the complex temple layout rather than individual room-based challenges. It's not my favorite of the four temples - the music is a bit grating and the uniform look of the hub room means it's hard to keep track of where you are, where you've come from and where you're supposed to be going.
The boss of Snowhead Temple is Goht, who is a mechanical goat. (Thus the name). Beating this boss is fun, if overly simple - in Goron form, you roll around after Goht as he runs in front of you, hitting his legs with your body and dodging the bombs, boulders, and other obstacles which he tosses in your way. He occasionally gets faster and starts throwing more stuff at you, but it's largely straightforward.
After you beat Goht, you return to psychadelic bubble world and meet another Dahl-esque giant. Tatl asks the question that we all want to, except more politely - "what exactly are all of you?" to which the giant replies "Guardians." Tatl surmises that the giants are protective gods, which explains why they're in the temples.
Link and Tatl are booted out of rainbow bubble land, and you're treated to a lovely cutscene of the snowstorm stopping and the ice and snow melting from Snowhead and the surrounding area. As usual, when you save, everything reverts to the way it was - except this time, you have Goht's Remains, the item proving that you've freed the giant from the Snowhead Temple.
Next time - Link saves cows from aliens, raises an invisible soldier's self-esteem, raids an all-female pirate fortress (and not in a National Lampoon way), rides a giant sea turtle, and kills a Zora guitarist. Stay tuned!
South Clock Town, dominated by the aforementioned
Clock Tower.
After the Happy Mask Salesman's little temper tantrum and subsequent quest-imparting, you end up in the main hub of Majora's Mask - Clock Town, like I previously mentioned. The only really important stuff that happens here is sidequest-related, so largely it serves only as somewhere to start at after restarting time.
The first thing you'll notice is that, as a city, it's much larger and more vibrant than anything in Ocarina of Time - there are many more shops and independent buildings here, loads of townspeople going about their business, and a much more organic atmosphere. This is largely a result of the increased RAM allowance now that the Expansion Pak has been installed, and it really changes the entire feel of the game.
The Southern Swamp
You may also notice that many of the townspeople are on their own schedules, independent from yours - for example, the innkeeper, Anju (who uses the same sprite as the Cucco lady from Kakariko village in the previous game) moves around the city and the inn depending on which day it is and what time of day it is. Many of the sidequests require you to find and speak to people at certain times of day (or night,) so it adds a lot of interest to the gameplay. Even the weather changes from day-to-day - for example, the first day is sunny, the second day it rains, and the last day is punctuated by occasional earthquakes.
Your first order of business, like Tatl mentioned, is to check out the Southern Swamp, accessed by leaving town from the south gate. (Logical.) Now that the Mask Salesman has changed you back into a human, your Deku scrub form is available to you by means of the Deku Mask - you can put it on and take it off almost anytime. There are around two dozen masks in the game, some optional, some not, and all with their own unique powers. The Deku form, for example, lets you hover for a short time and blow magical spit bubbles (I know, I know) which can come in handy in a variety of situations.
The Deku Palace Gardens. Make sure you have a
stress ball nearby.
There are only four temples in the game, so to create length and interest, it takes the completion of several quests in order to access each one. After you complete the right quests, Link will learn an Ocarina song which will allow you to enter the temple, and most of the time he'll gain a new mask which will allow him to change forms or gain a new power. Some of the quests can be tedious, mostly because they often require a lot of backtracking to get items or masks that you didn't know you needed.
In order to get into the first temple, for example, Link saves the witch Koume, who has been knocked out by Skullkid, with one of her sister Kotake's potions. Then, some adorable white monkeys tell Link that their brother has been imprisoned by the Deku King under suspicion of kidnapping the Deku Princess. Link, being the great guy that he is, goes to save the monkey, which involves traversing a couple of Hyrule castle-style mazes in Deku form. If you get spotted by the guards, you have to start over. I don't think I need to tell you how old this gets.
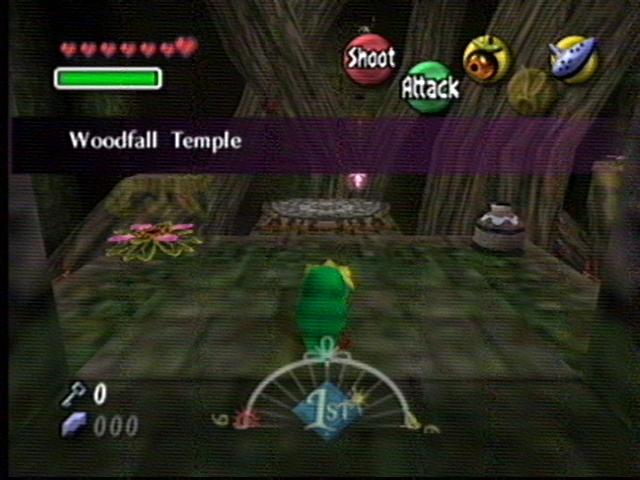
Woodfall Temple as Deku Link. You can see a Deku Flower
in the top left, which lets Deku Link hover.
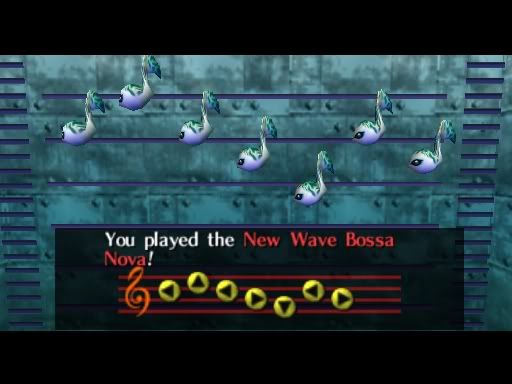
After you do all this, you find the monkey, who tells you that the princess has actually been captured by a monster in the Woodfall temple and that you should probably go save her. (Go figure.) He teaches you a song that will let you open the temple, and then you get caught by the guards and kicked out. Stupid guards.
The temples in Majora's Mask can be hard, although much of the difficulty comes from non-linear layouts rather than head-scratching puzzles. The Woodfall temple is straightforward, though, and has incredibly unique and well-designed rooms and music. A lot of attention was paid to location-appropriate enemies and obstacles, which contributes to an immersive (if sometimes really, really frustrating) experience.
I'm going try my best to ignore the uncomfortably racist
pseudo-African look of Odolwa in favor of gently
reminding my audience about the importance of sensitivity.
All the temples follow standard Zelda format - there are a few rooms in which you have to defeat several enemies to open new doors, all temples have at least one mini-boss, and you have to collect the boss key to proceed to the end. All the temples also feature small keys, maps, and compasses to help you on your way.
There are new, species-specific obstacles as well - Deku Link can use Deku Flowers to hover or hide from enemies, Goron Link can smash large switches and push blocks that regular Link can't, and Zora Link can swim and breathe underwater.
The bosses in Majora's Mask range from hilariously easy to stupidly difficult, but all four of them are totally unique experiences. The first boss, Odolwa, is the only one which you can fight without the aid of at least one mask, and the arena in which you fight the bosses range in size and style. (You have to become a giant to fight one boss, which is awesome in a Godzilla kind of way.)
Link, what did I tell you about cough syrup?
After you complete Woodfall temple, you are teleported to a bizarre bubble world and come face-to-face with what I can only describe as a massive head with long, spindly arms and a decidedly Roald Dahl-esque look. It (he? She? Zhe?) teaches you a song and instructs Link to "call us." I wish I could tell you that's the last time you see these freaks, but there are four - one for each temple - and they ultimately save your ass from being crushed by a giant, angry moon. It's all par for the course, honestly.
You're given the item "Odalwa's Remains," rescue the Deku Princess by stuffing her into a tiny glass bottle (I don't even know) and then free the monkey from his execution at the hands of the Deku King. The swamp, which previously had poisoned water, is all healthy again and whatnot, and you saved the day! Isn't that great?
And I thought the Wind Fish was bizarre.
Except not really. This is where the dark side of Majora's Mask comes in - once you return to the first day in order to save, everything goes back to the way it was. Nobody has saved the princess yet, the monkey is still about to be executed, Koume is still dying alone in the forest, and the swamp is still full of poison. The only things that you retain are the songs you've learned, the key items you've gained, and Odolwa's Remains. You've saved the giant which was trapped inside Odolwa's Remains, but nothing else has been resolved.
But, you only have three days to save the world, so you can't help them. Instead, you're forced to move on to the next area if you want to get all the giants to help you stop Skullkid.
With that happy thought, stay tuned for the next section of Majora's Mask - Snowhead Temple.
Original Release: April 27, 2000 (in Japan); October 26, 2000 (in North America)
Game #: 6
Chronologically: #2, Young Link timeline (it's a direct sequel to Ocarina of Time)
After the massive success of Ocarina of Time, Nintendo was keen to get another N64 Zelda out on the market as fast as possible. In order to reduce the turnaround as much as possible, the folks at Nintendo decided to re-use the graphics engine and the vast majority of the sprites from Ocarina of Time - after just over a year of production, Majora's Mask was the result.
It's Skullkid. He's not giving off a really friendly vibe.
The graphics of Majora's Mask were far from a direct copy, however. Using the N64's shiny new "Expansion Pak" (which allowed the developers four extra megabytes of RAM,) Majora's Mask had much better draw distances, impressive new lighting effects, more characters possible on-screen at one time, improved textures, motion effects, and eliminated the distance "fog" seen in Ocarina of Time - in Majora's Mask, it was possible to see farther, better, and brighter. The increased memory allowed for more complex sidequests, the storage of individual NPC schedules (based on a daily clock) and far more unique and diverse landscapes than had been possible for its predecessor.
Thematically, Majora's Mask is kind of a black sheep - the story is dark, full of death, and has elements of the bizarre which had never been seen before in the series. The "gimmick" of Majora's Mask is the introduction of a three-day clock - as Link, you repeatedly play through the same three days over and over again.
The only way to save the game is to play the Song of Time (from the previous game.) This resets the three-day clock completely, including your progress thus far, any quests you have completed, rupees, and consumable items. The only things which are retained are your key items, songs, masks, and dungeon completion items. If you fail to reset time before your three days are up, the world ends.
Heavy.
Majora's Mask is one of the less-played titles in the series, so for your benefit, here's a brief summary of the first little bit of the game:
The game opens on Link, explained to be the Hero of Time from the previous game, riding through an unknown forest on Epona. It is suggested that he has left Hyrule in search of Navi, his loyal fairy companion from Ocarina of Time, who disappeared after Ganon's defeat.
That is one deep hole.
Suddenly, two fairies (looking very much like Navi) come into view. They startle Epona, who throws Link off her back onto the forest floor, where he is knocked unconscious. Another strange being - we later learn his name is Skullkid - comes into view, wearing an odd mask. He searches Link's unconscious body, where he finds the Ocarina of Time; he steals it and plays a few notes, failing to notice Link waking up behind him.
Link lunges for Skullkid, but he dodges and jumps on Epona's back. Link is dragged through the forest as he tries to hold on to his horse, who Skullkid has startled. Eventually, Link loses his grip and watches Skullkid ride away with his horse and the two fairies.
I feel like maybe Link should stop drinking cough syrup.
Link follows Skullkid into a dark cave, where he falls down a long passage - "down the rabbit hole," just like Alice in Wonderland. As he falls, he sees psychedelic shapes and symbols rush up towards him, and then he suddenly lands safely in a room at the bottom.
Well, kind of safely. Skullkid is there with his two fairy lackeys, and it's really clear now that he's a total dick. After telling Link that he "got rid of" Epona since she wouldn't listen to his commands, he turns Link into a Deku Scrub and informs him that he's going to trap him in the bottom of the hole and let him die down there.
In Japanese, Tatl is called "Chat." I assume this is because she won't shut up.
As he floats away, laughing, one of his fairy companions sticks around to give Link one last jibe. Unfortunately for her, she sticks around a little too long and is sealed inside the room with Link as the door closes. This is Tatl (like "tattle",) your new fairy companion. She informs Link that the other fairy is her brother, Tael (like "tale" - "tattletale", harr harr) and that it's now Link's responsibility to get them out of the situation so she can go find her brother and let Skullkid know he's gone too far. (Funny how she didn't seem to think Skullkid was going too far before she got locked in the cave, but whatever.)
Yeah, that Happy Mask Salesman. If you don't think he's
nightmare fuel now, you will later.
Anyway, Link and Tatl manage to get out of the scary cave and emerge in a weird room filled with gears and clockwork. Suddenly, the Happy Mask Salesman appears. He tells Link that he can be changed back into a human if Link and Tatl can get the Ocarina of Time back, under two conditions - they recover a mask which Skullkid stole from the Salesman at the same time, and they do it within three days. The Mask Salesman doesn't go into detail about this now, but it becomes apparent soon enough.
That doesn't look right...
Once you go out into Clock Town, the main hub city of the game, you realize that you were standing in the Clock Tower. After doing a few tasks for people around town during the three day cycle (including playing tag with some kids and rescuing a Great Fairy,) it becomes apparent that something isn't quite right in Termina, the country in which Link's landed. For one thing, the moon is scowling, evil, and headed right for Termina. It gets closer and closer over the course of the three days, adding an extra special touch of horror to the game's events.
Link finally figures out that Skullkid has been hiding out on top of the Clock Tower the whole time. The Clock Tower only opens once a year - at midnight on the eve of the Carnival of Time (which is scheduled to take place on the fourth day) - so Link and Tatl climb the tower just as the moon is about to crash on Clock Town, destroying Termina.
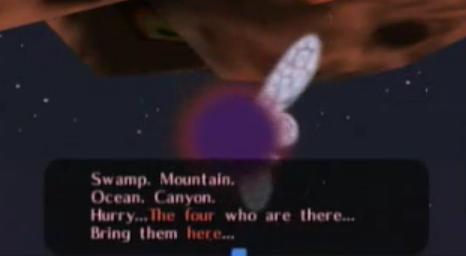
Link gets his ocarina back from Skullkid but is unable to get the mask back - Skullkid is just too powerful. Tael, who is with Skullkid, begs them to bring back "the four" who live in the swamp, mountains, ocean and canyon to stop Skullkid. In order to save his and Tatl's lives, Link plays the Song of Time, which returns them to the first day.
Link goes to see the Mask Salesman, who seems to be unaffected by the flow of time, and he turns Link back into his original form. When the Salesman realizes that Link hasn't retrieved the mask, he is not happy. He explains that the mask is called Majora's Mask, and was created by an ancient tribe to use in hexing rituals. Nobody really knows what the mask does anymore, but as the mask was eventually sealed away by the tribe, he's pretty sure it's not good. (That explains the giant scary moon.)
Told you he was nightmare fuel.
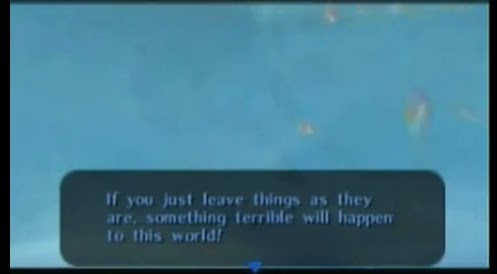
He charges Link to get his mask back before something terrible happens, and the game starts in truth.
 To be fair and honest, not a lot has changed in this game in terms of the bare-bones mechanics since Ocarina of Time. However, the addition of masks that can drastically change the way you interact with areas is brilliant, and while the three-day system can be a little bit of a pain in the ass, it's innovative and I have to give Nintendo credit for the idea. In terms of difficulty, the puzzles in dungeons are a decent challenge and you're never thrown up against anything too horrible. (It even errs a little on the easy side, I think.) I will say that sometimes it's not at all clear where you're supposed to be going and what you need to get to proceed.
 Majora's Mask has some wonderful tunes in it, and some lazy tunes in it. Each area (except Clock Town) has one of two tunes attached to it - either the main Overworld theme (once you've cleared the area's dungeon) or the "troubled area" theme which is slightly remixed to suit each area. I feel that it would have helped the game to have each area with its own music, but whatever. Some of the music is a little cheesy, and a lot of it is taken right from Ocarina of Time. When it's good, though, it's really good - Skullkid's theme was designed to sound like something out of a Chinese opera, and is definitely creepier than anything in Ocarina of Time. You definitely end up being more afraid of Majora than of Ganondorf. Each dungeon has its own great tune that was nicely composed.
 The game looks good - it's an improvement from Ocarina of Time. The textures are much improved, the colors are much better, and each environment was really treated with time and concern. I think my particular favorite is the Astral Observatory, which you visit right at the beginning of the game, but I can't honestly think of anywhere in the game I might call "ugly" or "nondescript." There are a few graphical issues - swords and weapons still clip through walls and floors, it's possible to wedge yourself into some weird camera angles, etc. Still, for the machine they were working with, they did a pretty great job.
 This game is the greatest thing ever. Who doesn't want to play a game over and over again which has a falling scowling moon in it?