 |
| The first room in the dungeon, right side up. |
 |
| The first room in the dungeon, upside-down. |
One, you've got the Elegy of Emptiness now, so you can hold down several switches at a time with your various forms. Two, using the Mirror Shield and the Light Arrows (which you get in the dungeon,) you can reflect light around and/or destroy sun blocks with the mighty power of the sun. Three, this temple flips upside-down halfway through, which Nintendo manages more elegantly than you might think.
There are places where the fact that the temple flips around can be a little bit frustrating, particularly if you're collecting the Great Fairy fragments in this temple. When switches are pressed, often chests will appear on the ceiling where they can't be accessed unless you go back to the beginning of the temple and flip it over again using the Light Arrows. These chests also allow you to reach new areas with your hookshot, though, so the feeling is fairly organic. The design of the dungeon is such that it works really well both ways, and the upside-down layout is so unnerving in places that it really gives an interesting feel to the second half of the temple. (For example, as you can see in the upside-down room above, loads of the rooms suddenly have huge areas where you can fall into the sky. It's a cool effect, particularly at night, I think.)
 |
| Garo Master |
Anyway, once you get to the end of the temple, you face the boss as usual. This time, though, you've got the Giant's Mask that you pick up for beating Eyegore. The Giant's Mask can only be used in one place in the entire game, and it just so happens to be in the boss arena of this temple.
 |
| Fighting Twinmold with the Giant's Mask. |
 |
| Maybe he just meant that he wants us to give him a call sometime to meet for coffee. That would be embarrassing later. |
Now it's showdown time with Skullkid. All you have to do is head back to Clock Town and wait out the three days, just like the first time, and climb up the Clock Tower once it opens up at midnight on the Third Day. A lot of people like to obsessively prepare for this battle, but as long as you've got a few fairies kicking around and a lot of arrows, you should be absolutely fine.
 |
| Yay weird naked giants! |
Once you play the Oath to Order (that song Link learned from the first giant) Skullkid has a massive freak out. The giants appear from all four corners of Termina and manage to just stop the moon from falling with their massive, Roald Dahl bodies. Hooray!
That works out super well and Skullkid falls to the floor, which is awesome. Tatl sasses him some more, because she's like that, and Tael is a big loser and tells her to forgive him and stuff. Obviously he didn't see the disturbing crap we've been put through over the last umpty-billion three day cycles.
 |
| For all her annoying phrases, I can see why Link wants Navi back. Apparently most fairies are total sissies. |
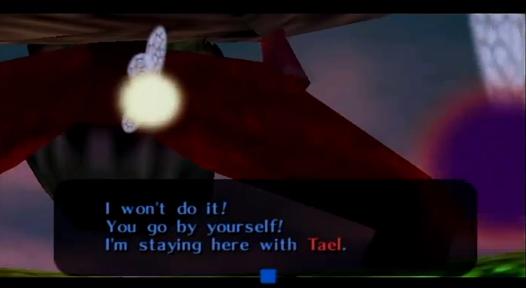
Tatl shows her incredible bravery by refusing to follow Majora's Mask into the moon, until Tael mans up and says he'll come along. You all warp into the moon together.
 |
| Moon! Moooooon! |
 |
| In Japan, this mask is known as the 'Oni Mask,' which means demon. |
The Fierce Diety's Mask is the final 'transformation' mask in the game, and can only be used in boss arenas. Basically, it turns you into a scary version of Adult Link from Ocarina of Time. If you have magic power, you can shoot sword beams, and you do a crapload of damage.
When Majora gives it to you, he tells you that you're the bad guy, and the bad guy's job is just to run away. The Fierce Diety's Mask's description reads: "Could this mask's dark powers be as bad as Majora?" (Translation note: in the Japanese version, the mask is called the Oni Mask, or Demon Mask. When you play tag in Japan, the person who is 'it' is called the 'Oni,' so that's what Majora is referring to.)


You're then warped to an arena where you face the three forms of Majora - Majora's Mask (a huge version of the mask with tentacles growing out of the back of it,) Majora's Incarnation (Majora's Mask with spindly legs and arms which runs around the room,) and Majora's Wrath (Majora's Mask with burly arms and legs and whips growing out of its arms.)
None of them are particularly difficult, especially if you have the Fierce Diety's Mask equipped. If you don't, all three forms are similar to enemies you've fought before - you can only hit the first form from the back, the second form is quick so you have to wait for it to slow down before you can hit it, and the third is okay as long as you stay away from it's tentacle whips.
 I'm going to be honest here - this battle is really not what it should be. When you fought Ganondorf/Ganon in Ocarina of Time, it was a big deal. It was scary. Your palms got all sweaty and it was hard! There were time limits, there were collapsing towers, there was a giant form which could kick your ass if you weren't sure how to approach it properly, you got your sword kicked away...it was huge. This battle, not so much. It's easy without the Fierce Diety form, and it's a waste of time with it on.
But, in a way, I'm okay with that. This Zelda isn't really about the temples or the fighting or the bosses - it's about the people and the land. It's about figuring out people's secrets and fixing their problems. It's a game full of mysteries that are never solved, whether it takes place in Link's subconscious or it's sort of an Alice in Wonderland or Wizard of Oz story after Link falls down the hole in the tree. I love that about this game.
Anyway, once you beat Majora's three forms, that's it. You're done. The ending sequence is absolutely phenomenal - I have to say that it's probably my favourite of any Zelda game. Depending on how many masks you got, you get a different ending - you only get the complete ending if you got all of them. If you missed one, you won't see the scene associated with that mask.
Here's the ending for your viewing pleasure.
The very end of the game is mysterious, like everything else. Link rides back off into the forest he came from, but to what? It looks otherworldly in some ways, not at all like the Lost Woods of Ocarina of Time. Some people are convinced that Majora's Mask entirely takes place while Link is at the edge of death, and that the forest represents the gap between death and life. Is Link riding back into the world of the living, or away from it? Is the forest just the Lost Woods? What happens to him after Majora's Mask? Does he ever find Navi?
I hope you enjoyed this really ridiculously long "summary" of Majora's Mask. It's my favourite in the series for a number of reasons, so I hope you'll forgive me for spending a lot of time on it. I'll be back later with a comprehensive review of the game, and then we're on to Oracle of Seasons!
I forgot about the weeeiiiird unexpected LSD-powered Moon sequence xD
ReplyDeleteIt's probably not my favourite Zelda, but despite people around not having liked it much, I remember that I really enjoyed this one.
Granted, it's not exactly what you expect at first from a Legend of Zelda game. But that's its charm. I like Majora's Mask for being really original and "hors série" (too lazy to find something equivalent in english :P)
Okay yo Remi all that phrase is bringing up in my mind is hors d'ouevres. And then I remembered to not suck at French and I am feeling like it means something like unique. Which is true and more relevant than it being like a tasty snack you pop in the oven when guests come over.
ReplyDeleteI think how ride into a time paradox and get trapped into the link between worlds
ReplyDelete